Wholesaling University · Lesson 10 of 19

Property Walk-Through Checklist

How to walk a house with a seller so you leave with an honest repair list, the photos your buyers need and the answers you need to make an offer.

Module 4: Running the numbersAbout 12 min readFree course
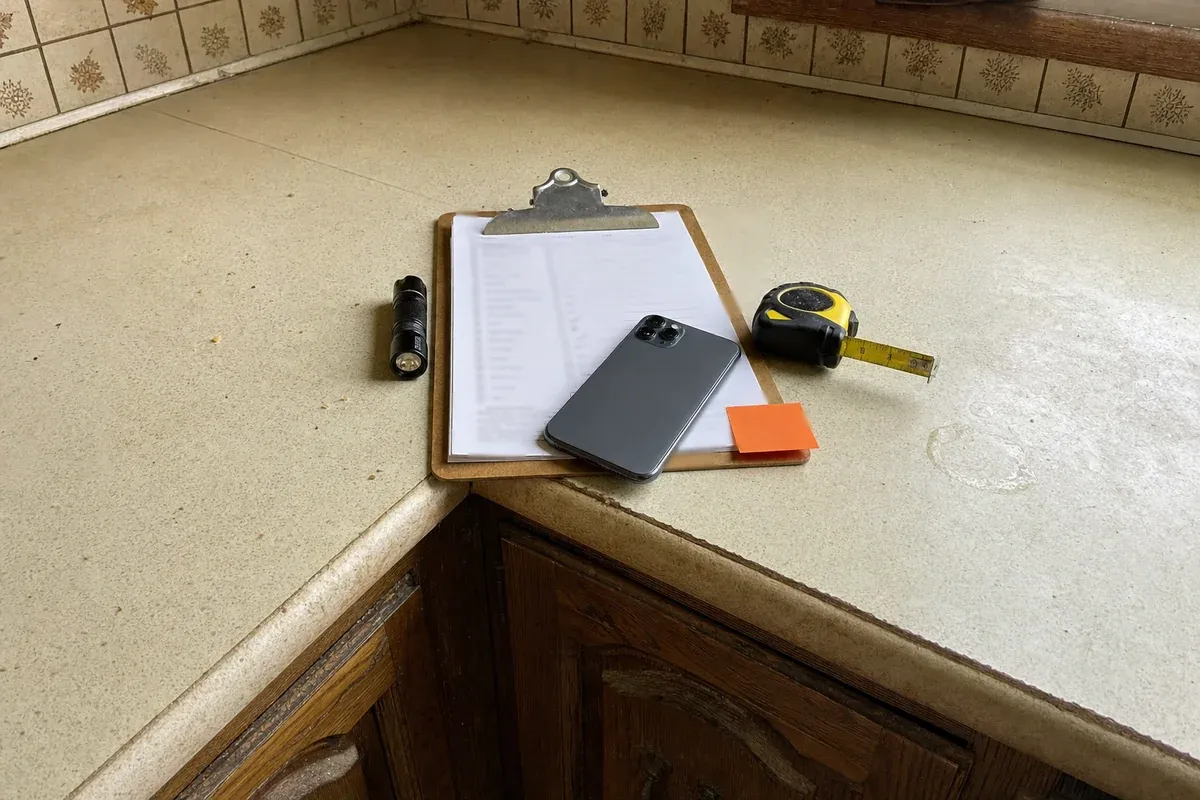
Property walk-through kit: a clipboard checklist, a flashlight, a tape measure and a phone on the counter of a dated kitchen
Quick answer

A walk-through is your visit to the house with the seller. Talk first: why they're selling, their timeline and what they know is wrong. Then walk the outside, every room and the major systems, and write down each repair. Photograph everything your cash buyers will ask about. Note safety flags, and leave with a clear next step.

Lesson
10 of 19, module 4: Running the numbers
Time
About 12 minutes to read
You'll need
A flashlight, a charged phone, a tape measure and this checklist
Next
Lesson 11: estimating rehab costs
The short answer

What is a property walk-through?

The walk-through is when you go to the house, meet the seller and see the property with your own eyes. It's not a home inspection. You're not there to grade every outlet. You're there to get three things.

First, an honest repair list, so your rehab estimate and your offer hold up. Second, photos your cash buyers can use to decide fast. Third, the seller's story: why they're selling, when they need to move and what matters most to them besides price.

Most new wholesalers rush the walk-through and pay for it later, when a buyer finds the bad roof or the old electrical panel and backs out. This lesson is the checklist I'd want on my clipboard. I'm a real estate investor, not an attorney or financial advisor, and I'm not a home inspector either.

Talk

Learn why they're selling, their timeline and what they know is wrong.

Walk

Outside, every room, then the roof, systems and foundation.

Photograph

Every room, every side of the house and every big repair.

Plan

Leave with a repair list and a clear next step.

Pack the night before

What to bring to a walk-through

You don't need a truck full of tools. This fits in a small bag.

ItemWhy you need it
This checklist, printedSo you don't skip the attic or the water heater when the seller is talking
A charged phone and a backup batteryYou'll take a lot of photos and short videos
A small flashlightBasements, crawl spaces, attics, under sinks and inside closets
A tape measure or laser measureRoom sizes, and to check the square footage on the county record
Your comps and ARV estimateSo you know what finished houses sell for nearby. See Lesson 9.
Shoe coversA small sign of respect in someone's home
Two copies of your purchase agreementIn case the seller is ready. See Lesson 13.
Step by step

How to walk a property with a seller, step by step

Step 1: Set the appointment and prepare

When you book the walk-through, ask who will be there. If two people own the house, try to get both. Ask if anyone lives there now, and if there are pets or anything you should know before you arrive.

If the house is rented, the owner usually has to give the tenant notice before you come in. How much notice depends on the state and the lease. California, for example, presumes 24 hours' notice is reasonable before a landlord shows a rented home to a buyer. Let the owner handle the notice, and be respectful of the tenant's home.

The day before, pull your comps, run a rough ARV and look at the county record for the square footage, year built and lot size. Be on time. Being late to a seller's house is a bad start.

Checklist
  • Every owner invited
  • Tenant notice handled by the owner, if it's rented
  • Comps and county record reviewed
  • Your bag packed

Step 2: Talk before you walk

Before you look at a single room, sit down for a few minutes. Ask, and then listen. These answers matter as much as the roof.

Ask why they're selling and when they need to move. Ask what they've updated, what they know is wrong and whether there's been water in the basement or a leaking roof. Ask if they have a mortgage, back taxes or liens, and whose names are on the deed.

Write the answers down. If the seller says the roof is 5 years old, you'll check that against what you see.

Questions to ask the seller
  • Why are you selling, and when do you need to move?
  • What have you updated, and when?
  • What do you know needs work? Any leaks or water?
  • Is there a mortgage, back taxes or any liens?
  • Who is on the deed, and does anyone else need to sign?
  • What would you take with you, and what stays?

Step 3: Walk the outside

Start outside, before you're inside talking. Walk all the way around the house.

Roof: curling or missing shingles, sagging, moss and patched spots. Gutters and drainage: does the ground slope away from the house, or toward it? Foundation: cracks, bowing walls and gaps at the corners. Siding and trim: rot, holes and peeling paint. Windows: broken glass, rotted frames and fogged double panes. Driveway, walks and steps: heaved or crumbling concrete. Also look at the garage, fence, trees over the roof, and whether the house is on a septic system or city sewer.

Checklist
  • Roof condition and rough age
  • Foundation and drainage
  • Siding, windows and trim
  • Driveway, garage and trees
  • Septic or city sewer

Step 4: Walk every room

Go room by room in the same order every time, so you don't skip anything. Look up, down and around.

Look for water stains on ceilings, soft spots in floors, cracks over doors and windows, doors that won't close, and smells like mold, pets or sewer. In the kitchen and baths, check cabinets, counters, floors, and under the sinks for leaks. Run a faucet and flush a toilet if the seller says it's OK.

Write each repair down as you go, and say it out loud in a normal way: "Ceiling stain here, I'll note it." It keeps you honest, and your offer won't surprise the seller later.

Checklist
  • Every room, the same order every time
  • Ceilings, floors, walls, doors and windows
  • Under every sink
  • Each repair written down
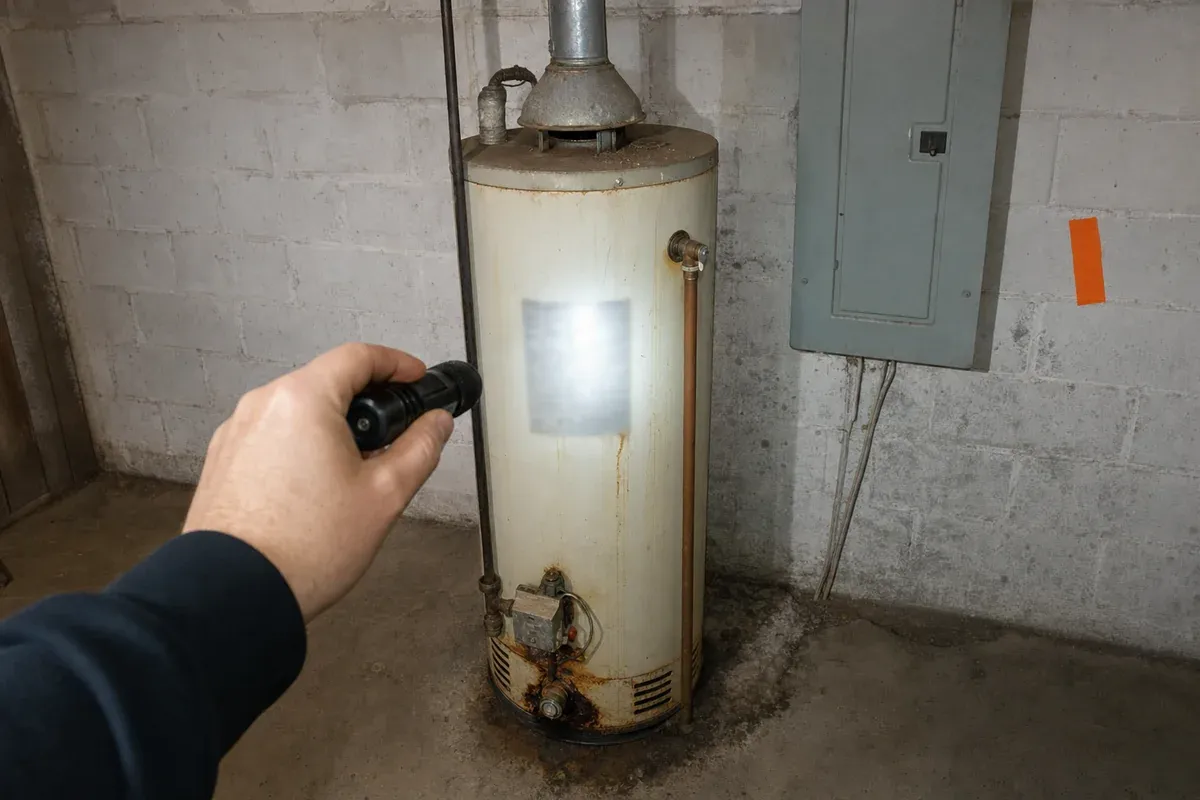
Walk-through photo to take: a flashlight on the data label of an old, rusty gas water heater, with the electrical panel, cover on, beside it in a basement

Step 5: Check the big systems

The systems are where the big repair costs hide. You're not testing them. You're getting an age and a condition.

Heating and cooling: find the data label on the furnace and AC. Many show a manufacture date, or a serial number that encodes one. Water heater: same thing, from the label. Electrical: look at the panel with the cover on. Note its size, any burn marks and anything that looks unusual, and let an electrician judge it. Plumbing: note the pipe types you can see and any leaks. Attic, basement and crawl space: water, sagging, insulation and signs of pests.

Don't take apart anything, open the electrical panel or go anywhere that feels unsafe. A buyer's inspector or contractor can do that later.

Checklist
  • Furnace and AC age from the labels
  • Water heater age
  • Electrical panel photographed, cover on
  • Attic, basement or crawl space checked

Step 6: Note safety and environmental flags

Some problems change who can fix them and what it costs. Note them so your rehab estimate and your buyer aren't surprised.

Lead paint. The EPA says about three-quarters of U.S. homes built before the federal ban on lead paint for homes still have some. If the house is that old, assume lead paint until it's tested. Paid renovation work that disturbs paint in those homes falls under the EPA's lead renovation rule, which requires certified firms. Asbestos can be in old floor tiles, pipe wrap and siding. Don't disturb it. Mold: the EPA says an area larger than about 10 square feet calls for its guidance on bigger cleanups. Structure: sagging floors, big foundation cracks and soft roof decks need a pro.

You're not diagnosing anything here. You're writing down what a buyer will ask about.

Checklist
  • Year built checked for lead paint
  • Possible asbestos noted, not disturbed
  • Mold or water damage measured roughly
  • Any structural concerns noted

Step 7: Take your buyer photos

With the seller's OK, take the photo list from the table above. Shoot in landscape, with the lights on and the blinds open. Take a short video walking through the main rooms too. It answers a lot of buyer questions.

Name the files by room when you get home. You'll use them for your rehab estimate in Lesson 11 and your deal sheet in Lesson 15.

Checklist
  • Every room, all four sides and the roof
  • Systems labels and every problem area
  • A short walk-through video
  • Seller's OK to share with buyers

Step 8: Wrap up with a clear next step

Sit back down and go over what you saw. Ask if you missed anything. Then tell the seller what happens next.

If your numbers are ready, you can make your offer at the table. Lesson 13 covers how. If you need to price the repairs first, say so, and set a time to come back or call, ideally within a day or two. Don't leave without a next step on the calendar.

Checklist
  • Repair list reviewed with the seller
  • Offer made, or a follow-up time set
For your buyers

The photos to take on every walk-through

Cash buyers decide from photos first. A good set saves you trips back to the house.

AreaPhotos to take
OutsideFront, back and both sides, the roof from the ground, the street view, the driveway and the garage
Every roomFrom the doorway, wide enough to show the whole room. Then any damage up close.
Kitchen and bathsCabinets, counters, floors and under the sinks
SystemsThe data labels on the furnace, AC and water heater, and the electrical panel with the cover on
Basement, crawl space and atticFoundation walls, water stains, the roof deck from below and the insulation
ProblemsEvery leak, crack, stain, soft spot and missing piece, with something for scale

Ask before you shoot. Get the seller's OK to take photos and to share them with buyers. Leave out family photos, mail, medicine and anything personal. Never photograph people or tenants' belongings in a way that identifies them.

On paper

A walk-through summary

Example of a one-page summary on a made-up house. Your notes will look different on every property.

Example

Made-up 3 bed, 1 bath ranch

The seller inherited the house and lives out of state. It's been vacant for 8 months.

AreaWhat you sawNote for the estimate
RoofCurling shingles, 2 layersFull tear-off
FurnaceLabel shows it's about 25 years oldPlan to replace
Water heaterLabel shows it's about 6 years oldKeep
KitchenOriginal cabinets, leak under the sinkFull kitchen
BathSoft floor around the toiletSubfloor and full bath
PaintBuilt before the lead paint banCertified firm for paint work

Two big-ticket items (roof and furnace) and a full kitchen and bath. That's a full rehab, and your offer has to reflect it.

Avoid these

Mistakes to avoid on a walk-through

Walking before talking

The seller's story drives your offer. Sit down and ask first.

Skipping the attic, basement or crawl space

That's where the roof, water and foundation problems show up.

Guessing system ages

Read the data labels. They're right there.

Taking photos without asking

Get permission to photograph and to share with buyers.

Opening the electrical panel or going somewhere unsafe

You're not the inspector. Note it and move on.

Leaving without a next step

Make the offer or set the follow-up before you go.

Recap

Lesson recap

  • Bring a flashlight, a charged phone, a tape measure, your comps and this checklist.
  • Talk first: why they're selling, their timeline, what's wrong and who's on the deed.
  • Walk the outside, every room and the big systems, and write each repair down.
  • Photograph everything your buyers will ask about, with the seller's OK.
  • Note lead paint, asbestos, mold and structural flags, and leave with a next step.

Before you walk. Tenant notice, disclosure and lead paint rules vary by state and change often. Read Lesson 2 for the state rules, and have a local real estate attorney answer anything specific to your deal.

See the whole Wholesaling University course free

Enter your name and email to read the rest of this lesson and every lesson in the course.

  • The full text of every lesson, opened on this device
  • Every step, worked example and checklist
  • My free Wholesale Deal Analyzer (Excel)

Free. No credit card. Unsubscribe anytime.

Unlocked. You're signed up, so every Wholesaling University lesson is open in full on this device.
Tools

Where to go next

The walk-through feeds straight into your numbers. These lessons pick up from here.

Lesson 11

Estimating rehab costs

Turn your repair list and photos into a rehab estimate your offer can stand on.

Read lesson 11
Lesson 9

Calculating ARV

What the house will be worth once it's fixed, from sold comps.

Read lesson 9
Lesson 13

Making your offer

How to present your number at the kitchen table and get it signed.

Read lesson 13
FAQ

Property walk-through FAQ

What should I look for on a property walk-through?

Start with the big-ticket items: roof, foundation, heating and cooling, water heater, electrical and plumbing. Then walk every room for water stains, soft floors, cracks and leaks under sinks. Write each repair down and photograph it for your rehab estimate and your buyers.

Is a walk-through the same as a home inspection?

No. A walk-through is your visit to understand the house and the seller well enough to make an offer. A home inspection is a detailed report by a trained inspector. Your cash buyer may still order an inspection or bring a contractor before closing.

How long should a walk-through take?

For a typical house, plan on about an hour: a few minutes talking with the seller, then the outside, every room, the systems and photos. Bigger or rougher houses take longer. Don't rush it, because missed repairs come back as lower offers or lost buyers.

What photos do cash buyers want?

All four sides of the house, the roof, the street, every room from the doorway, the kitchen and baths up close, the data labels on the furnace, AC and water heater, and close-ups of every problem. A short walk-through video helps too. Get the seller's OK first.

Can I walk a house that has tenants?

Usually, but the owner normally has to give the tenant notice first, and the rules depend on your state and the lease. California, for example, presumes 24 hours' notice is reasonable. Let the owner arrange it, and treat the tenant's home with respect.

Should I make an offer during the walk-through?

If your comps and repair numbers are ready, you can make your offer at the table, and that's often best. If you need to price the repairs first, tell the seller and set a time to come back or call within a day or two.

Next: lesson 11, How to estimate rehab costs

A quick way to ballpark repairs so your offer holds up.

Heads up: I earn a commission if you buy through my link. Costs you nothing extra, but it helps fund my Starbucks addiction. ☕

Not legal advice. Confirm with a licensed attorney in your state.

Not financial or legal advice. Wholesaling University is for education. David Frizzell is a real estate investor, not an attorney or financial advisor. Wholesaling laws vary by state, so check the rules in your state before you market a property or make offers, and talk to a local real estate attorney if you're not sure.

Free download

Free wholesaling contract pack

Wholesaling contract templates, free. Enter your email and the pack lands in your inbox.

Free. Unsubscribe anytime. After you sign up you can read my DealMachine review.